Waggons West Etsy Shop

Wednesday, January 30, 2013

Madrona Road Challenge Quilt: Patching the Road to Madrona


This is my entry for the Madrona Road Challenge.  

The Madrona Road story fragments are about travel: journeys of the body and spirit.  OK.  There is also some fantastic nonsensical imagery as well but my first impression was of travel.  My quilt had to be a journey.  Everyone knows that journeys are seldom smooth.  Sometimes silly goats stand guard and robots abound.  Besides, it is winter around here and that means freezing and thawing.  Which means potholes.  And that means patching crews.  Thus the title for this quilt. 

(You were worried I was going to go all philosophical on you weren't you.  Can't go there with this fabric.)

Members of Modern Quilt Guilds all over the country  were provided 7 fat eighths of Madrona Road Fabric (Violet Craft) by Michael Miller. We had just under 2 months to complete a quilted project using these fabrics.  We were only allowed to add solid colors. 


I chose to use white to bring out the colors in the fabric.  You can see some of the story fabrics here.

It is funny that the fabric I liked the least while piecing (it is the black with the yellow flowers visible in this photo) turned out to be my favorite once it was quilted. 


The details.  This quilt is 27 x 42 inches.  It is made with Michael Miller's Madrona Road prints and white quilters cotton.  The batting is cotton.  It is machine pieced and machine quilted.  The binding is hand stitched. 

You can see all of the entries in the challenge by going to the Flickr page here

What is that Smell?

A couple of my larger cuts of fabric from my last visit to the remnant table.

If you have been to Hancock's of Paducah you know all about the remnant tables.

Well first, let me say that HoP is an incredibly utilitarian store.  Almost all of the 'shoppers' in the building are employees filling internet orders.  The fabrics are ordered by designer, collection and manufacturer.  There are little street signs to guide you to your favorite.  They are not laid out to inspire creativity or to showcase the shop's creative bent.  They are set up to be found, cut and returned with speed and precision.

As a casual shopper it is almost overwhelming to wonder up and down the rows in the warehouse setting.  You have to have some sort of strategy or you hit overload and can't find a thing.  Now that I have been there a few times, I usually try to make a plan first.  I decide I am going to look for purple and yellow or I need to coordinate a focus fabric or I am looking for polka dots.  Then I wonder up and down the aisles looking for specific colors or patterns and do my best to tune out the rest.  Usually my plan involves spending time at the remnant tables.

These are huge tables piled high (sometimes neatly and other times a total mess) with remnants of everything.  I always try to fold and stack as I work my way around the table.  There are always hidden treasures to be found.  Pieces of fabric I have ogled and adored at a price I can afford.  I have fallen in love with the bright colors of Kaffe and I almost always find a few pieces.  Here, as with the rest of the store, I try to have a plan.

The last time I was there, I was by myself.  No impatient spuds chomping at the bit to get back on the road making me rush.  I approached the remnant table with joy.  There was a cute older couple working both sides of the table along with me.  It was clear they had a plan.  It was also very clear that he was as involved in the fabric selection as she was.  I struck up a conversation with them.  Sharing bits and pieces that seemed to fit with their search.  In the course of our conversation I mentioned to the lady that she was fortunate to have such a treasure in her husband.  His patience and participation was remarkable.  We continued to chat a bit and when asked, I said that my husband did the cutting for most of my quilts.  She commented that she could use that sort of help and then said "if only I could find some one to baste and pin for me...."  Another shopper at the end of the table commiserated.  I simply said "spray glue".

The sweet lady stiffened her spine and said "I hand quilt".  The kibitzer said "well I never".  Both of them quickly walked away.  You would have thought I made rude noises and emitted noxious gasses!  I don't think I've ever cleared a room faster.

Yes, I use spray baste.  I love the stuff.  For the record, I also use starch!  I think I have said before that the "original" spray baste in the big white cans truly is noxious and horrible and gummy.  If that was my first experience with spray baste I would never pick it up again.   Today there are lots of different versions.  I've used the 505 spray from my embroidery projects, the Dritz version and now Spray and Bond.  I like them all.  they don't gum up my needles and they hold really well.  If I still had to baste or pin, I probably wouldn't quilt.  And I hand quilt too!

At any rate, my little admission of indiscretion left the field clear and netted me several large cuts (3+ yards) of fabric, a bit of a Dear Stella pattern I needed to coordinate with a project and some more Kaffe to add to my collection.   

If you want to think less of me as a quilter, that is OK.  I respect traditional quilters.  We can still talk designs and fabric.  If you really want to be picky about it just remember, while you are holding your nose, I might just be working efficiently and finding the only 4 yards of American Jane fabric on the table.  

Tuesday, January 29, 2013

Weather

When the temperature is set to go from near 70 to almost 30 over the next 12 hours it shouldn't be too much of a surprise that the storms are building.  Hanging in the spud cave while it all rolls through.  Interesting experience. 

Monday, January 28, 2013

Left Behind


I finished this Wall Hanging last year. I don't really think it is finished.  It should be bigger,  but I think I am finished with the Teesha Moore Style for a while. I don't have any great ideas for how to make it bigger.  I'm not sure the recipient would want it to be any bigger.  So I am left with some patches and some blanks.  

side 1

side 2


I've been sorting and folding and filing for the last week or so.  The dilemma is whether to keep them around on the off chance that I figure out a plan for enlarging the quilt or do I look for a good home for them.  I really don't know what to do.  Suggestions?    What do you do with your leftovers? 

Saturday, January 26, 2013

Pink Ribbon Quilt


A very special person I know is a very impressive lady with amazing skills who is always showing me new things and teaching me stuff.   She also happens to be a breast cancer survivor.  I admire her immensely.

She is not, however, a big pink ribbon kind of girl.  So when I went to make her a  prayer quilt, I needed to find a way to have it represent a pink ribbon without being pink and ribbony.  When I saw this pattern by Ryan Walsh, I knew it was the right thing.  It took a while to find the right fabric.  I stalled out completely on trimming the blocks until I found the right ruler.  It took a while to figure out how to set the finished center and to add the borders.  I spent a fair amount of time looking for the right fabric to mix in with it. 


The next really long stall was quilting.  I wanted to do it myself.  I needed it to be pretty and set off the quilt.  I needed it to be something I could manage.  I came up with  a strategy and did a lot of measuring and marking.  I traced around a pattern I created and then stitched away. 


Here you can see some of the very simple design I did in the blocks.  I should have made this more swirly. 


Here you can see more of the quilting and the binding from the back.  I also should have scalloped the sides.  The rounded corners almost make up for it.


 One more look at it... blowing in the wind. 

Path to my Heart


This is my entry for Project Quilting Season 4, Challenge 2: My favorite color

This quilt absolutely insists that it's name is Path to my Heart.  I am not exactly sure that the drunkard's path is the best path to my heart.

My goals for Project Quilting this year are simple.  First I want to finish a quilt for each challenge.   Second, I want to use materials from my stash.  Lastly, I want to work on technique.  This quilt is complete, so I met my first goal.  Everything in this quilt is from my stash.  Second goal. Check!  I intended to make this the traditional way and learn to sew curved seams.  However...  It was Wednesday night before I could get started and I just didn't feel I could finish.  So, this drunkard's path was completed using the raw edge applique method.  

The quilt is about 21 x 24 inches.   The fabrics are all solid quilter's quality cotton.  I think but am not positive they are Kona.


The heart, surface appliqued onto the top after the rest of the quilting was done.


The obligatory arty picture of the binding.  I am not sure this binding was the correct choice but a plain red or plain white did not seem to fit at all.


Ok another one.  I was having fun taking pictures.


Here is a picture of the back of the quilt.  You can see the quilting.  It is a simple wave through the red blocks.  I am particularly pleased with the even seams that I managed to mostly iron in the correct direction!


Be sure to check out all of the other great quilts at the flickr page

New Badges: Green Beer


Friday, January 25, 2013

Hot and Sour Soup


Who knew it would be so easy to make hot and sour soup.  It is one of my favorites.  Something I don't get very often as all of our favorite chines restaurants have closed up shop.  I had some leftover pork chop so I decided to try and make soup. 

1 32 ounce box of chicken stock
2 T rice wine vinegar
1/4 + tsp chili garlic paste (to taste)
1/4 tsp garlic powder

3 mushrooms sliced very thin
leftover meat sliced thin

Bring all these ingredients to a strong simmer.

Mix about 2 T cornstarch with about 4 T soy sauce
Slowly stir into soup and let thicken.  (Mine didn't get very thick but that was OK with me.)

One egg beaten.

Slowly.  Very slowly, just barely moving.  Stir the soup in one direction.  Pour the beaten egg in in a slow stream.  pause to let it cook a bit and add some more.  If you stir too much or in multiple directions you don't get the nice sheets of eggs.  You get a more mush-like soup.

Add sliced green onions.  Adjust to taste with salt, chili paste, garlic, soy sauce.

Serve and enjoy.

This was a 10 minute soup that was perfect for this cold winter day.  

Progress


The challenge this week for Project Quilting is My Favorite Color.  I have the top pieced together.  I need to decide if it is going to get any borders and how best to quilt and bind it.  No problem.  I have until noon Sunday! 

Thursday, January 24, 2013

Sewing.

... my Project Quilting challenge quilt.  It is Thursday and I am just now getting started.  Go check out the flickr page of all the quilts that are already finished and posted! 

Tuesday, January 22, 2013

Catching up

Whew!  It was great to get away for the long weekend.  Now I have to dig in and and get caught up with all sorts of things.  I'll post some pictures of the treasures I found at Hancock's of Paducah once I get my camera uploading properly.

As for my weekend...  we had a great day at the Flying Monkey!  It is a fun show with great artists and super crowd (particularly for a Saturday in January).  Mr-really-?-another-show even volunteered to run the booth on when he has free weekends.  Yay!  We explored a number of the locavore restaurants.  Some really yummy sit and talk to the chef places.  But the Huntsville Havoc?  Textbook every time until they hit the banana peel... every time! 

Friday, January 18, 2013

Frustration

I will be visiting Hancock's of Paducah BEFORE the next Project Quilting Challenge is revealed on Sunday and I won't be able to sew anything until I get some badges finished early next week.  Right now I have 3 quilts fully laid out in my brain and no chance to put them together.  And all of them have deadlines.

Thursday, January 17, 2013

Inventory


I am going to see if I can get in to the Flying Monkey artist market this Saturday.  I don't get to Huntsville very often so this will be a rare opportunity.  I am absolutely fascinated by the idea of  what is essentially a low cost, walk-in art show.  In preparation for the show, I decided to do an inventory on the badges that I have in stock and to see what I need to replenish.  I was also looking for gaps in content.  By the time I was done counting I realized I have more than 130 different badge designs.  Not counting a few that never lasted long enough to get a divider in the stock boxes.  Unfortunately, I only have 80 different items listed in my Etsy shop and some of those are quilts and sunpaintings.  I guess I will be spending some quality time with the camera shortly!  


As a side note... when I asked Spud 3 to bring the 'show boxes' upstairs, he added the box of chickens.  I told him I was traveling light and only taking badges.  

"What???  No chickens?"  

"I haven't sold any chickens for a while.  I'm just  taking badges."

"But everybody LOVES chickens."

"I know.  But I don't want to have to carry so much since you won't be there to help me."

"Just a few?"

"OK.  Pick out a few of your favorites and I'll take them along."  


---  now it seems all of the air space in the show box is full of chickens!  What a softie.


Wednesday, January 16, 2013

Making Sawdust


When my dad worked in the shop my brother always said he was making sawdust.  In reality he was carving and sculpting and turning and generally making amazing things.  But bro always called it sawdust.  I'm wondering what he would call the remnants from my badge-making.  The scrippy scraps get saved for a friend who makes paper.  The pockets go to a friend who is saving them for a project.  I'd love to find some one who could use the zipper, seams and waist band.  Any takers? 

Permission

That seals it.  The last spud can officially learn to drive.  Nothing like a day at the DMV to start off a year of white-knuckle riding. 

Monday, January 14, 2013

More FMQ


Here is a quick look at another quilt that is almost finished.  It was my first attempt at following a design with FMQ.  As with my Square Roots quilt, I made a cardboard template and traced around it with water soluble marker. 

Saturday, January 12, 2013

Square Roots

Project Quilting Week 1:  Square in Square in Square.
This wall hanging is 21 inches square.  It is made from vintage blocks originally cut and collected by my grandmother.  The binding is from a piece of vintage yardage collected by my great aunt.  I stuck with the simple relatively modern design to highlight these unique fabrics.  The square in a square pattern reminds me of looking into the infinity mirror seeing the past and future reflected together.  The traditional feather quilting is a nod to the skill of those quilters under whose quilt frame I used to play


The challenge for this week was really square.  Since I was overly ambitious the last time I tried one of the challenges, I decided to stick to the basics and work on technique.  Browsing through the myriad of square quilt blocks (did you know there was a myriad of square quilt blocks?  Whodathunk?)  I came across the picture from this tutorial  by Little Miss Shabby.


 This seemed like the perfect project to use some of my vintage patches from Grandma.  I remember my grandmother and then later my grandfather as well, sitting at the dining room table in the farm house, tracing around cardboard templates, cutting around the pencil lines and stacking them up.  Every time I see the pencil marks on these fabrics I think of them. 

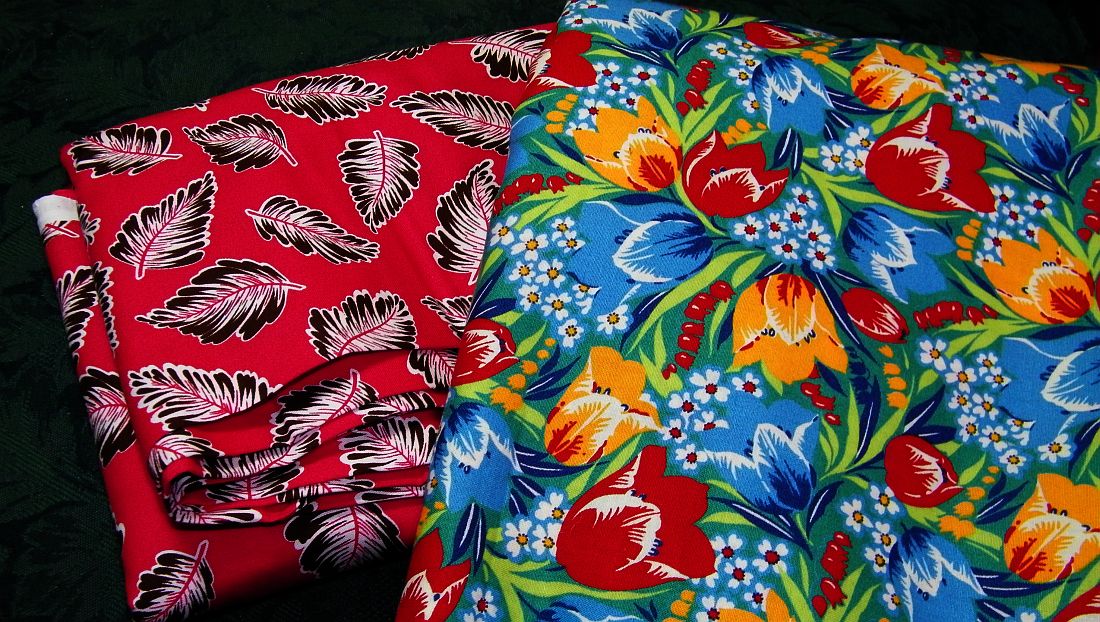
 I sifted through the box of what I thought were 2 inch patches and pulled out my favorites.  Many of these were onsies, the only square of that fabric in the box. I chose them because they were some of the oldest and most interesting fabrics in the collection.   Most of them were wonky.  Every time I look at them I imagine my grandmother picking them up, seeing they don't work and tossing them back in the box.

As I was sewing the blocks together I realized that they weren't 2 inch blocks.  They are, in fact, 2 1/8 inches on a side.  It wasn't a problem.  I just had to do some more measuring and calculating for the white spaces.  There was a fair amount of ripping involved as I had to keep making fine adjustments to get the wonky blocks to line up.  Since I was working on improving my technique, I did a lot of ironing and starching and re-sewing to make sure I had quality seams. 


The completed flimsy measured 21 inches on a side.  I used a slightly off-white Kona for the sashing. 


I spent some time deciding how to quilt it.  Several of my on-line friends provided very useful suggestions.  A nod to the traditional feather seemed the most fitting way to celebrate my grandmother's fabrics.

I was all set to try a new marking technique.  


My test patches made it clear that this was not going to work.  So I resorted to cardboard templates and watersoluble pens.


There are some definite issues with my FMQ but I am generally pleased with my ability to follow the lines and keep a reasonable stitch length.


An over all view.  I probably need something in the last sashing but I don't have a good plan yet.


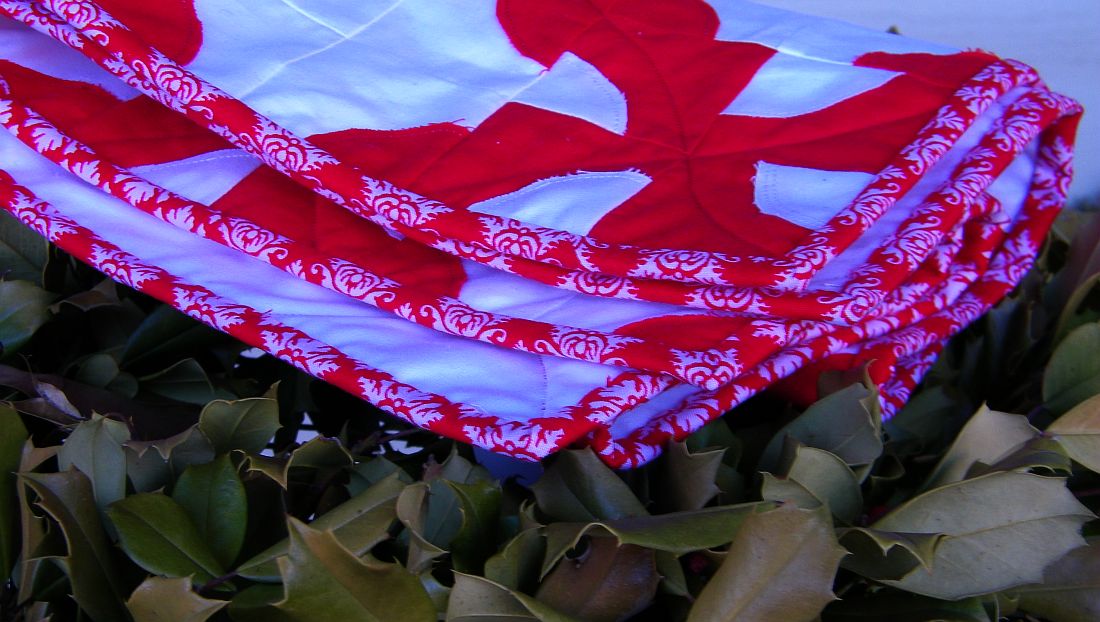
Here is a detail of the feathers on the outside.  Not too many crossed lines.


Deciding what to do for the binding was also an issue.  I had intended to use my standard fine black and white check.  However, it seemed more appropriate to use a bit of vintage yardage from my great aunt.  


Thus my completed project for week 1 of  Project Quilting.  Be sure to click on over to the Flickr page and see all of the really amazing quilts on display and to see the myriad interpretations of square in square quilt blocks. 

Friday, January 11, 2013

Wonky House Swap


Here are most of the wonky houses I received in the craftster block swap.  I need some more and I don't feel like making them.  Anyone interested in doing a small swap for a block or two? 

What if I make you some machine embroidered quilt labels or some other embroidery?  Let me know if you are interested.  

Thursday, January 10, 2013

PQ1: FMQ


I decided to do it the old fashioned way.  Made a cardboard pattern and traced it with water soluble marker.  Now I can say I have quilted feathers!  It seems appropriate somehow given the source of the fabric.


A little corner detail.  I didn't go over my stitches too many times.


And the whole thing.  I should probably add something to the space between the squares but I don't know what.  Now it is on to the binding.  Either my old stand by tiny black and white checks or a more daring use of some vintage yardage.

Wednesday, January 9, 2013

New Plan Needed

 I saw this great plan for marking your quilts for FMQ.  Trace the design on Press and Seal using a Sharpie.  Stick the plastic to the top and stitch away.  As long as the sewing isn't too dense it will tear away nicely.  Probably one of the biggest advantages is that you can really see the quilting pattern on the top without having to erase your mistakes.  The plastic can easily be moved around to make sure the placement is good.  

So, that is what I did for my project quilting piece.  I drew out my feathers.  I traced them forward and backward onto the press and seal.  I placed it on the top.  I like what I have come up with so far.  I am all ready to quilt. 


Fortunately, I am not at all confident in my skills so I did a test piece.  Worked like a charm.  The film didn't interfere with the sewing.  It didn't shift around.  Except for some tension problems I was able to follow the pattern without making too many mistakes.  Even better, it came right off after I was finished sewing.  Well all but the color left behind on the thread. 


You can see it even better in this image I've altered to have greater contrast.  A lovely orange smear on much of the thread.  This was NOT a design element I want to include in my project. Now I need to come up with a different marking plan, perhaps the wide orange sharpie was too much ink.  Perhaps it would be better if it dried longer.  Perhaps a very fine sharpie or a prisma color would bleed less. 


 I tried some free hand feathers on the side.  Perhaps I can manage to do a few guidelines with the watersoluble marker and go from there.  I'm not sure.  Any suggestions?  Any experience with using Press and Seal.  I would really like to make that functional.  It is an easy way to do things as long as it won't ruin my projects.