
Here is hoping that your 2012 dawns brightly and brings you all that you need.
 I'm trying to put together a bloggers choice fat quarter package... I've got my inspiration and now all I need is to get it narrowed down to 12 prints and 3 solids.
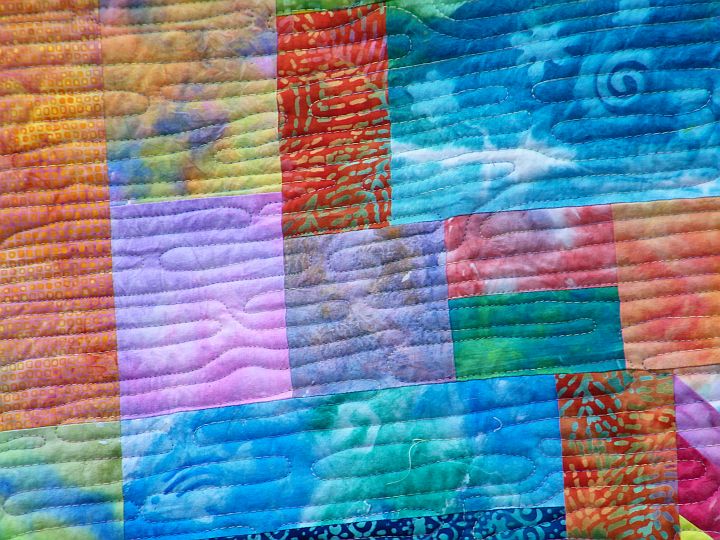
 This was done with simple line stitching using a walking foot along the lines on the block. It went together in a couple hours. The backing and the binding were stash fabrics. There wasn't quite enough of the star and moon fabric. I pieced in a couple bits of dark blue and orange.
  The second is the quilt that did not want to be made. I started with the bug fabric about 12 years ago. It was going to be a simple strip quilt. However, the strips kept cutting crooked. So We put it aside.


 Go figure!


For a large crowd I provide wooden skewers instead of the 3 remaining fancy forks that came with my fondue pot. That way there isn’t any confusion about which belongs to who and everyone can enjoy the chocolate.
If you don’t have good temperature regulation on your fondue pot, i.e. a candle or sterno pot, you will need to keep track of this heat it when it gets cool and blow it out the rest of the time as the candle can scorch the bottom.
Enjoy.
A great party snack to have on hand in the freezer. Make them up well in advance and heat them up as needed. Another recipe re-post as part of my ongoing effort to collect them all in one place.
This recipe is for those of you who are looking to warm up a party. I have no idea where I got it. I started using it more than 10 years ago and still follow my handwritten instructions. If anyone can identify the original source I will gladly provide credit. What I’ve written below is the directions I actually follow. These freeze well and re-heat easily.
Jalapeno Bites
8 ounces shredded Cheddar cheese
3 ounces cream cheese
4 chopped green onions
1 can (drained) chopped green chilies
Mix ingredients until well blended. Put about a teaspoon of filling on the side of a wonton wrapper. Roll it diagonally across, folding in the bottom as you go. Seal with water. Then rub a little cold water across the inside of the still open top. Pinch together. The finished product should look vaguely like a chili pepper. If that is too complicated just wrap and seal any old way. It won’t affect the taste. Deep fry in 375 degree Fahrenheit oil until crispy and lightly golden. You can serve and eat now or freeze for later use. Freeze in a single layer until solid then store in a zip lock back. Reheat frozen jalapeno bites in a 350 degree oven for 5-10 minutes until warm and crisp.
Yes, I am still collecting my recipes from around the intertubes and re-posting them here. If you make it through the dense prose to the recipe you will find a quick version of apple butter. this is a great idea for a Christmas gift. You can make it overnight and gift it tomorrow. Just be sure to let your recipient know that it needs to be refrigerated unless you take the time to properly can it.
Today I was preparing for a weekend retreat.
I baked chocolate Chip Cookies, that necessitated cleaning out the baking supplies box since it avoided landing on my head by falling between the door and shelves in the worst possible way. Fortunately, everything is bagged so the chocolate chips didn’t erupt all over the floor. I used up the cucumbers by making a batch of gazpacho. I mixed up the red wine vinaigrette for tomorrow’s watermelon salad and I made a batch of plum sauce for the pulled pork from some fresh plums. The plum sauce isn’t as plummy as I would like. I had to make adjustments as it got too salty and it took me a while to discover that the plum vinegar was LOADED with salt. I am still babysitting a batch of apple butter. It seems that my too virtually identical small inexpensive crock pots are not all that identical. One gets hot enough that the apple butter finishes in a few hours. The other cooks at a nice even but sloooooow temperature. I keep putting the crock in the microwave to boost the temp. It is a crazy balancing act between cooking and burning. But I guess that is always the way it works with apple butter.
I’ll start with the apple butter recipe since it is simplest. Buy a jar of apple sauce that is approximately twice the volume of apple butter you want to end up with. It will reduce by at least half as you cook it. Pour it into your slow cooker and start cooking. If you have a low setting and lots of time, leave it over night. Otherwise, watch and stir every once in a while. Once it is reduced by about half, taste and add sugar if you choose. It isn’t really necessary but some people like things sweeter than others. Stir in some cinnamon to taste. Let it continue to cook until it is thick and at least a caramel brown. Store any leftovers in the fridge.
We usually have this on fresh bread and eat it up quickly. You can serve it over ice cream. I’m making this batch to serve with tomorrow’s pulled pork. We also really like to use it to make porkchop primavera. I know it sounds weird but it is truly worth a try. Even the spuds like this one!
Yet another recipe re-post as part of my effort to collect all of my recipes in one place. This one is for a chicken stew/noodle dish that is pretty quick and easy to make and very tasty on a cold winter day.
I have three teenagers. I shop at Costco. A lot. I’m going to start using the blog to keep track of my recipes. As a person who cooks by smell my ‘recipes’ are more guidelines than recipes. You will just have to adjust things until they taste right to you.
Tonight… Coq au vin … kinda sorta.
1 bubble of boneless, skinless chicken thighs
Browned in olive oil.
Added 1 small onion chopped and continued to brown for a minute or two
Added 4 cloves garlic sliced
Added about 1/2 cup of three-buck-chuck merlot to deglaze
Added about 3 cups of chicken stock.
Added the rest of the baby bella mushrooms sliced (about 1/2 package)
Seasoned with pepper, french thyme, rosemary and parsley.
Allow to stew for about an hour.
Added more pepper (couple of squeezes on the grinder), stock (about another cup) and wine (a healthy splorp)…
Thicken with flour (about 3 Tbls shaken in 1/2 cup cold water) I didn’t make it very thick, just enough to stick to the noodles.
Served over noodles with toasty garlic bread to mop up the juice.
Garlic bread was made from a couple of leftover mini loaves cut in half, spread with butter, sprinkled with garlic and parmesan cheese and baked at 375 for about 7 minutes.
The spuds liked the garlic bread. The dad had seconds on the stew. And… they will all note, there was not a tomato in sight. A truly rare occurance around here.


This is a re-post. I was looking for recipes to pre-load into the que so that the blog won't go completely dark over the holidays. I came across this one from a few years ago. I will note that is is now the week before CHRISTMAS instead of Thanksgiving and I don't have ANYTHING in the freezer.
I was looking at the calendar today trying to schedule a meeting and realized that not only is Halloween over, but Thanksgiving is almost here. I have to be ready to travel this weekend. The week we are gone will be fun but not terribly productive. Then it is back just in time for the first round of holiday parties. We are triple booked for the first of December. That is before adding in anything the kids might actually want to do that weekend.
[...]It will just be one crazy round of events from this weekend until after the New Year. That is when our big party is. It used to be that I would start planning for our party in July. Start canning jams and preserves and tomatoes and bottle liqueurs in August. By the time the very very last tomatoes were coming off the vine in September I’d have the last batch of fresh tomato chili (save the arguments for the comments) in the freezer ready to go. November would be baking, baking, baking, until my mother and mother-in-law’s freezers were so full they finally conspired to buy me the biggest freezer they could find. By the time our party rolled around on the first of December the house would be decorated, the cookies baked and the friends fed.
Now here it is almost Thanksgiving and I am just putting the first batch of cookies in the freezer. I know the party has been delayed a month, so the whole schedule is offset one month, but still. Thanksgiving and I’ve only put one batch of cookies in the freezer?
[ I will note that is is now the week before CHRISTMAS instead of Thanksgiving and I don't have ANYTHING in the freezer. ]
Granted, I’ve learned a lot since the early days of hosting the mega party. For starters, I trimmed and cut the batch of Nanaimo bars before I wrapped them to go into the freezer. I do that with all of the bar cookies these days. No more spending a day before the party waiting for the cookies to thaw enough to cut them. Actually the hardest lesson was to line the pan with foil so that the whole batch lifts out in one smooth motion and I can cut them with a really big knife in one smooth motion. No more sawing across the pan and breaking half trying to pry them out with a spatula.
Another lesson is to make small batches of different things and not worry about each guest getting one of each. I guess this is a lesson, because I get bored making the same thing over and over again. I prefer the variety.
Yet another big win on the party preparation scene has been teaching my kids to cook. I know that on party day all I have to do is say to spud one “time to set up the cheese tray” and he will chill the marble, pull out the right cheeses and make an artfully arranged tray including some froufrou decorations and the right knife. Tonight, I told spud two that he needed to make me some snicker doodles. He went straight for the cookie cookbook and will get started soon. And they will be very nicely formed, tasty cookies. Of course that will lead to spud three pulling up a recipe on the internet to test out. Actually, spud three is much better at rolling dough than I am which is absolutely fantastic. The cookie baking is much easier now.
But it still has to be done so I will get back to it. I wonder if I still have 6 weeks for the cranberry liqueur to steep?
[EEEEEP!!!!!!!!!!!!! Now I am in full blown panic mode. Which may be a good thing ... or not.]

tasty donuts
About a bajillion years ago I was in charge of a donut making fundraiser. We ended up spending about 20 hours straight making over 800 dozen cake donuts. I still can’t stand cake donuts although I can be persuaded to eat the good yeasty kind you get at the bakery.
The spuds have occasionally asked me to make donuts and I have refused until I was sucked in by this post at the Pioneer Woman Cooks. Today I made donuts.
They were not the lovely perfection displayed on the web. But I did manage to get a pretty good sample by the time I was finished. I do have a few corrections/changes to the recipe so I am posting them here where I will be able to find them.
1. The recipe calls for adding the flour mixture to the wet ingredients without actually describing a flour mixture. I assumed it meant to mix the flour and salt together.
2. Roll out the dough to be THICK. I did the quarter inch described in the recipe. Some were thicker. In the future I will roll it out to a half inch. The thicker donuts were MUCH better.
3. Flour the cookie sheet means flour the cookie sheet. More than a dusting. I deformed a bunch of donuts prying them off of the sheet.
4. Get the cast iron kettle re-seasoned. Even the heavy aluminum kettle doesn’t hold the heat properly.
5. Better yet, research a real fryer system. Any suggestions?
6. Use lots of paper towels and do not forget the turn and blot step.
7. Make the glaze different. I didn’t like the vanilla in it. I probably should have listened and added the salt. I think thicker might be better. Although once the glaze actually set up on the thicker donuts it was pretty good.
I may have to try this again, but it probably won’t be for a while. There is just something about the lingering smell of donuts frying…
It went from 60 degrees to 30 here in short order a good time for some spicy comfort food. So I am re-posting this as part of my ongoing effort to collect my favorite recipes from across the interwebs and band them together into one place.

Yes. You guessed it. Cleaned the kitchen and still no sign of my journal. [That would be my recipe journal where I write down recipes as I go so as to keep track of them. It had disappeared for several months in 2010 so I published my recipe notes on-line.] So you all get to see what is for dinner again. Pork chops were half price at the store today. It was bright and sunny and just warm enough to not need a coat. Now ordinarily my lack of a coat would not figure in to what I served for dinner, but today it did. There are peppers and mushrooms an d tomatoes that really needed to be used up. I was thinking a pork schnitzel with a jaeger or hunters sauce (can never remember the difference if any). But it was too warm for a heavy sauce and I started too late to want to get out eggs and breadcrumbs. So… Pork and peppers with orzo and fried corn.

Since this was total improve and since I didn’t pay attention to the amounts, what you get tonight is a roadmap rather than a recipe.
Pour just enough olive oil into a skillet to cover the bottom of the pan. Heat over high and brown each side of the pork chops quickly. Deglaze with wine (I used an open white zinfandel.) There was probably almost a cup of wine all told. I also added a bit of water to almost cover the chops in the pan.
Sprinkle on a bunch of garlic powder, onion powder** and cracked black pepper. I used quite a bit of each. Perhaps as much as 1/2 tsp. Lower the temperature and let simmer until the chops are just cooked through and the liquid is almost completely reduced.
Remove chops to a plate. Add about 1 cup of sliced mushrooms to pan. Saute until they are starting to brown. Add about 1 Tbsp butter. Add in 1 cup chopped red and yellow peppers and about the same amount of chopped fresh tomatoes. Saute until heated through. Finish sauce with 2-3 Tbsp more butter. Add about 1 tsp ground cumin and another big bunch of garlic. Return chops to pan to heat through.
Meanwhile. Cook orzo following package directions. Drain.
Add 1 Tbsp butter to skillet. Pour in on package frozen corn. Cook until water is evaporated and corn started to brown just a bit. Add cracked black pepper and a dash of salt.
Mix Orzo and corn. Pour sauce over. Top with chops. Serve warm.
Must have been OK. Here is the picture the littlest spud took of his plate!

**A couple of notes. If this wasn’t a throw it together as fast as possible meal, I would have sauted onions with the mushrooms and I would have used a couple cloves of minced garlic.
 This patch looks pretty simple, lettering on a simple shape. For me it represents a significant advancement in what I can do with my embroidery machine. If you have ever looked into digitizing software, or embroidery software of just about any kind, you know that it is crazy expensive. Thousands of dollars for the digitizing programs. Hundreds of dollars for simple visualizing software. Most places sell their designs for crazy amounts of money. Actually I understand the expensive designs as a way to cover some of the costs of the intellectual property along with the time and expense for digitizing.
 I am willing to spend. I've looked around for functional freeware versions that allow some level of digitizing or even basic editing functions. There isn't a lot out there. I've only tried the ones that don't have a huge trail of complaints about system crashes and other bad things. The biggest problem is the user interface. Many of the functions seem to be present but figuring out how to make them work is painful.
 CHICKENS!!!!


 As I was working on the latest batch, I realized that a few were missing. Essentially all of the camo chickens had flown the coop. Spud three walked into the room with a very serious expression on his face. He said, "I'd like to register a complaint." This was unusual behavior for him. I'd never heard him ask to register a complaint. The list of possible brotherly infractions, lunch bag violations and other possible problems rushed through my mind. I asked him what the problem was. He went on to say that the beak on his chicken was upside down. It made the chicken look stuck up. He wanted me to know that all future chickens needed to have their beaks sewn on properly. Of course his stuck up chicken was one of the missing camo chickens and despite the obvious 'flaw' he refused to give it back.


 What quilter can't use an extra pair of scissors.
 This little daisy is really little. It is only about 3/4 of an inch in diameter.
 And a dove to spread peace and joy for the holiday season.
 I will post pictures of the real prizes before the December 9 deadline so you will be all ready to answer the contest question and be in the drawing to win!
The deadline fast approaches and I MUST submit a recipe. I’ve pondered long and hard and thought about all of the things I’ve made using tea or coffee. I then thought about the things I’ve made for which I have fond memories. (I can recall several “OMG what is in this?” and “You call THIS coffee?”). By now you can probably tell I’m not much of a coffee or tea drinker. I like my caffeine with some carbonation and phosphoric acid.
When I do make tea it is for tea parties around the fire. I always use Red Rose brand (decaffeinated for the kids). I have one of those lovely teapots with a candle to keep it warm. I prefer lemon. (I can hear the groans from my elegant tea-drinking comrades starting in on everything I am doing wrong. But I’m not going to care about that.) For tea, the coffee table is spread with whatever tidbits and goodies we can pull out of the pantry and freezer. There is usually a cheese tray with a good cheddar and probably a havarti. There are good crackers. Sometimes there is bread with artisnal balsamic and olive oil. Sometimes there is bread with homemade jam. Some times we have an assortment of deli meats, roasted peppers, and marinated veggies. Fruit and veggies are often found. (Some of my littlest friends love strawberries and cherry tomatoes and we hate to disappoint.) There are always pistachio nuts and cookies. Any sort of cookie you want to make or buy. I’ll share some of our favorites at another time as I see from the little clock on my screen that I now have even less time than before.
Tea. At any rate. I’m not a big tea drinker. I didn't like it much as a kid until I was sick one year. My best friend and neighbor would always bring a chicken pox box, the invention of one of the neighborhood moms to save the sanity of another mom during an extended bout of chicken pox. Since I was a bit older than the traditional crayons and coloring book my friend included tasty treats. One of them was Russian Tea Mix. (Fingers in ears trying desperately to ignore the screams from the tea drinkers.) I don’t know if I’d drink it these days but my kids would. It is a fond memory and now I am going to share it with you.
Russian Tea
2 cups sweetened lemon tea mix
1 1/2 cups Tang
1 tsp cinnamon
1 tsp cloves
Mix together. Store in airtight container. Put 2-3 tsp in a mug. Add one cup boiling water. Stir. Sip. Enjoy.
I usually go light on the cloves. You
can use 1/4 cup tea mix and 1 1/2 c lemonade mix if you don’t have the flavored tea.


1 can (15 oz) pumpkin (not pumpkin pie mix)Start by melting the butter. (I forgot to do that!) Oil, grease, spray or just melt your butter in a 9 x 13 baking dish*.
1 can (12 oz) evaporated milk
3 eggs
1 cup sugar
4 teaspoons pumpkin pie spice
1 box yellow cake mix or spice cake mix
1 1/2 cups chopped pecans or walnuts
3/4 cup butter or margarine, melted
Whipped cream, if desired
Additional pumpkin pie spice, if desired


 Sunlight Project Quilt 2011
 Step 1
 Step 3
 Step 3 cont.
 Step 4
 Step 5
 Step 6

