Sunday, December 18, 2011
Blog Hop Party Winner!!!


Saturday, December 17, 2011
Panic Button
This is a re-post. I was looking for recipes to pre-load into the que so that the blog won't go completely dark over the holidays. I came across this one from a few years ago. I will note that is is now the week before CHRISTMAS instead of Thanksgiving and I don't have ANYTHING in the freezer.
I was looking at the calendar today trying to schedule a meeting and realized that not only is Halloween over, but Thanksgiving is almost here. I have to be ready to travel this weekend. The week we are gone will be fun but not terribly productive. Then it is back just in time for the first round of holiday parties. We are triple booked for the first of December. That is before adding in anything the kids might actually want to do that weekend.
[...]It will just be one crazy round of events from this weekend until after the New Year. That is when our big party is. It used to be that I would start planning for our party in July. Start canning jams and preserves and tomatoes and bottle liqueurs in August. By the time the very very last tomatoes were coming off the vine in September I’d have the last batch of fresh tomato chili (save the arguments for the comments) in the freezer ready to go. November would be baking, baking, baking, until my mother and mother-in-law’s freezers were so full they finally conspired to buy me the biggest freezer they could find. By the time our party rolled around on the first of December the house would be decorated, the cookies baked and the friends fed.
Now here it is almost Thanksgiving and I am just putting the first batch of cookies in the freezer. I know the party has been delayed a month, so the whole schedule is offset one month, but still. Thanksgiving and I’ve only put one batch of cookies in the freezer?
[ I will note that is is now the week before CHRISTMAS instead of Thanksgiving and I don't have ANYTHING in the freezer. ]
Granted, I’ve learned a lot since the early days of hosting the mega party. For starters, I trimmed and cut the batch of Nanaimo bars before I wrapped them to go into the freezer. I do that with all of the bar cookies these days. No more spending a day before the party waiting for the cookies to thaw enough to cut them. Actually the hardest lesson was to line the pan with foil so that the whole batch lifts out in one smooth motion and I can cut them with a really big knife in one smooth motion. No more sawing across the pan and breaking half trying to pry them out with a spatula.
Another lesson is to make small batches of different things and not worry about each guest getting one of each. I guess this is a lesson, because I get bored making the same thing over and over again. I prefer the variety.
Yet another big win on the party preparation scene has been teaching my kids to cook. I know that on party day all I have to do is say to spud one “time to set up the cheese tray” and he will chill the marble, pull out the right cheeses and make an artfully arranged tray including some froufrou decorations and the right knife. Tonight, I told spud two that he needed to make me some snicker doodles. He went straight for the cookie cookbook and will get started soon. And they will be very nicely formed, tasty cookies. Of course that will lead to spud three pulling up a recipe on the internet to test out. Actually, spud three is much better at rolling dough than I am which is absolutely fantastic. The cookie baking is much easier now.
But it still has to be done so I will get back to it. I wonder if I still have 6 weeks for the cranberry liqueur to steep?
[EEEEEP!!!!!!!!!!!!! Now I am in full blown panic mode. Which may be a good thing ... or not.]
Donuts

tasty donuts
About a bajillion years ago I was in charge of a donut making fundraiser. We ended up spending about 20 hours straight making over 800 dozen cake donuts. I still can’t stand cake donuts although I can be persuaded to eat the good yeasty kind you get at the bakery.
The spuds have occasionally asked me to make donuts and I have refused until I was sucked in by this post at the Pioneer Woman Cooks. Today I made donuts.
They were not the lovely perfection displayed on the web. But I did manage to get a pretty good sample by the time I was finished. I do have a few corrections/changes to the recipe so I am posting them here where I will be able to find them.
1. The recipe calls for adding the flour mixture to the wet ingredients without actually describing a flour mixture. I assumed it meant to mix the flour and salt together.
2. Roll out the dough to be THICK. I did the quarter inch described in the recipe. Some were thicker. In the future I will roll it out to a half inch. The thicker donuts were MUCH better.
3. Flour the cookie sheet means flour the cookie sheet. More than a dusting. I deformed a bunch of donuts prying them off of the sheet.
4. Get the cast iron kettle re-seasoned. Even the heavy aluminum kettle doesn’t hold the heat properly.
5. Better yet, research a real fryer system. Any suggestions?
6. Use lots of paper towels and do not forget the turn and blot step.
7. Make the glaze different. I didn’t like the vanilla in it. I probably should have listened and added the salt. I think thicker might be better. Although once the glaze actually set up on the thicker donuts it was pretty good.
I may have to try this again, but it probably won’t be for a while. There is just something about the lingering smell of donuts frying…
Friday, December 16, 2011
Pork, Peppers and Orzo Corn
It went from 60 degrees to 30 here in short order a good time for some spicy comfort food. So I am re-posting this as part of my ongoing effort to collect my favorite recipes from across the interwebs and band them together into one place.

Yes. You guessed it. Cleaned the kitchen and still no sign of my journal. [That would be my recipe journal where I write down recipes as I go so as to keep track of them. It had disappeared for several months in 2010 so I published my recipe notes on-line.] So you all get to see what is for dinner again. Pork chops were half price at the store today. It was bright and sunny and just warm enough to not need a coat. Now ordinarily my lack of a coat would not figure in to what I served for dinner, but today it did. There are peppers and mushrooms an d tomatoes that really needed to be used up. I was thinking a pork schnitzel with a jaeger or hunters sauce (can never remember the difference if any). But it was too warm for a heavy sauce and I started too late to want to get out eggs and breadcrumbs. So… Pork and peppers with orzo and fried corn.

Since this was total improve and since I didn’t pay attention to the amounts, what you get tonight is a roadmap rather than a recipe.
Pour just enough olive oil into a skillet to cover the bottom of the pan. Heat over high and brown each side of the pork chops quickly. Deglaze with wine (I used an open white zinfandel.) There was probably almost a cup of wine all told. I also added a bit of water to almost cover the chops in the pan.
Sprinkle on a bunch of garlic powder, onion powder** and cracked black pepper. I used quite a bit of each. Perhaps as much as 1/2 tsp. Lower the temperature and let simmer until the chops are just cooked through and the liquid is almost completely reduced.
Remove chops to a plate. Add about 1 cup of sliced mushrooms to pan. Saute until they are starting to brown. Add about 1 Tbsp butter. Add in 1 cup chopped red and yellow peppers and about the same amount of chopped fresh tomatoes. Saute until heated through. Finish sauce with 2-3 Tbsp more butter. Add about 1 tsp ground cumin and another big bunch of garlic. Return chops to pan to heat through.
Meanwhile. Cook orzo following package directions. Drain.
Add 1 Tbsp butter to skillet. Pour in on package frozen corn. Cook until water is evaporated and corn started to brown just a bit. Add cracked black pepper and a dash of salt.
Mix Orzo and corn. Pour sauce over. Top with chops. Serve warm.
Must have been OK. Here is the picture the littlest spud took of his plate!

**A couple of notes. If this wasn’t a throw it together as fast as possible meal, I would have sauted onions with the mushrooms and I would have used a couple cloves of minced garlic.
Thursday, December 15, 2011
Posh Parking?
Tuesday, December 13, 2011
Old School High Tech
 This patch looks pretty simple, lettering on a simple shape. For me it represents a significant advancement in what I can do with my embroidery machine. If you have ever looked into digitizing software, or embroidery software of just about any kind, you know that it is crazy expensive. Thousands of dollars for the digitizing programs. Hundreds of dollars for simple visualizing software. Most places sell their designs for crazy amounts of money. Actually I understand the expensive designs as a way to cover some of the costs of the intellectual property along with the time and expense for digitizing.
However, it is all way beyond what
 I am willing to spend. I've looked around for functional freeware versions that allow some level of digitizing or even basic editing functions. There isn't a lot out there. I've only tried the ones that don't have a huge trail of complaints about system crashes and other bad things. The biggest problem is the user interface. Many of the functions seem to be present but figuring out how to make them work is painful.
So, that little patch represents hours of trying to understand how to make the software work. Those little letters are all added to the basic badge file in the software, using a font unavailable on my machine. This old school name patch adds in a few more hours of learning: resizing, adjusting spacing, adding in cuts. Again, it doesn't look all that impressive from a digitizing standpoint, but it is a pretty big step for me.
Both badges are made of upcycled denim using polyester embroidery thread.
Monday, December 12, 2011
Chickens
 CHICKENS!!!!
One of the things I have tried to do ever since I started making projects to sell is to use materials that would otherwise go to waste. Thus most all of my sunpaint clothing and items are made from upcycled garments. My badges are made from upcycled denim pants. I use vintage and upcycled fabrics to make my bags and I've been making scarves and things out of t-shirts.


Since I've been making wacky hats for the Golden City Brewery, I've been acquiring a pile of fleece scraps.
Some of them are pretty wild. I've turned the long narrow strips into fleece scarves. They aren't very fancy but they are a low cost gift item that I took to the kids gift fair at a local elementary school. Since they were made from scraps, I was able to price them cheaply enough for the kids buy them without spending all their money on one gift.
I'd been looking at the bigger scraps for a while when it occurred to me that that they were the perfect size and shape for making our giant chicken pillows! The chicken pillows are a larger version of the tiny chickens I've been making for the kids at Easter time.


Tiny 3 inch chickens.
From the scraps available I am able to make three sizes. Small ones that are between 4 and 5 inches on a side. Medium chickens that are between 6 and 8 inches on a side and large chickens that are just about 12 inches on a side.

My kids love these chickens. It was originally spud 3's idea to make the little chickens bigger and out of fleece. He has helped make several in the past and we donated a few as prizes for charity events. They have always been popular for that purpose. One lady who won the zebra chicken pictured below is still so thrilled with it that she lets us know on a regular basis it is still on her bed.
 As I was working on the latest batch, I realized that a few were missing. Essentially all of the camo chickens had flown the coop. Spud three walked into the room with a very serious expression on his face. He said, "I'd like to register a complaint." This was unusual behavior for him. I'd never heard him ask to register a complaint. The list of possible brotherly infractions, lunch bag violations and other possible problems rushed through my mind. I asked him what the problem was. He went on to say that the beak on his chicken was upside down. It made the chicken look stuck up. He wanted me to know that all future chickens needed to have their beaks sewn on properly. Of course his stuck up chicken was one of the missing camo chickens and despite the obvious 'flaw' he refused to give it back.
We will be donating several of the ones we've made out of remnants and scraps. Others will be available at the next few shows we go to. Some are available in the shop.

Thursday, December 8, 2011
Blog Hop Party with Give Away!

The Give Away is over. Angela at home is the winner. Thank you very much for stopping by. I hope to see you again soon.

I have really been enjoying all the quilt blogs linked over at Quilting Gallery. So many really interesting quilters telling the stories of their quilts and their lives. They are hosting a Blog Hop Party over the next week. In order to play, you have to host a give away on your own blog. As I mentioned earlier, this will be my first give away. But what a great way to do it along with a couple hundred other quilters from around the world.
So here is the deal. I'm going to be giving away 4 of my little upcycled badges in the newest designs. I will also include a 5th badge that I am working on right now. It will be a little quilty bonus. I will update this post once I get a good picture of it.
 What quilter can't use an extra pair of scissors.
A sweet little kitty.
 This little daisy is really little. It is only about 3/4 of an inch in diameter.
 And a dove to spread peace and joy for the holiday season.
Here's the deal. Leave a comment below. Tell me which badge, either here or in my Etsy shop you like the best and where you would display it. I'll do the random number generator after the contest closes at midnight Central Time on December 17.
I am so excited to be a part of this blog hop. I hope you like my little offering. I can't wait to see all the other goodies. Click the button at the top of the post to visit the rest of the blogs.
Tuesday, December 6, 2011
I'm joining the Party!
This is my first giveaway so bear with me as I try to get it right. I'm also going to try and figure out international shipping for this one so my prize is going to be small. Very small! You will win an assortment of mini and micro badges and one special quilting themed item. Here is a sneak peek at the three sizes of badges. The micro badge with the holly on it is the smallest one I've done. It is the perfect size for an 18 inch doll.
 I will post pictures of the real prizes before the December 9 deadline so you will be all ready to answer the contest question and be in the drawing to win!
Wednesday, November 30, 2011
Stuff and things
Tuesday, November 29, 2011
Russian to Make Tea
The deadline fast approaches and I MUST submit a recipe. I’ve pondered long and hard and thought about all of the things I’ve made using tea or coffee. I then thought about the things I’ve made for which I have fond memories. (I can recall several “OMG what is in this?” and “You call THIS coffee?”). By now you can probably tell I’m not much of a coffee or tea drinker. I like my caffeine with some carbonation and phosphoric acid.
When I do make tea it is for tea parties around the fire. I always use Red Rose brand (decaffeinated for the kids). I have one of those lovely teapots with a candle to keep it warm. I prefer lemon. (I can hear the groans from my elegant tea-drinking comrades starting in on everything I am doing wrong. But I’m not going to care about that.) For tea, the coffee table is spread with whatever tidbits and goodies we can pull out of the pantry and freezer. There is usually a cheese tray with a good cheddar and probably a havarti. There are good crackers. Sometimes there is bread with artisnal balsamic and olive oil. Sometimes there is bread with homemade jam. Some times we have an assortment of deli meats, roasted peppers, and marinated veggies. Fruit and veggies are often found. (Some of my littlest friends love strawberries and cherry tomatoes and we hate to disappoint.) There are always pistachio nuts and cookies. Any sort of cookie you want to make or buy. I’ll share some of our favorites at another time as I see from the little clock on my screen that I now have even less time than before.
Tea. At any rate. I’m not a big tea drinker. I didn't like it much as a kid until I was sick one year. My best friend and neighbor would always bring a chicken pox box, the invention of one of the neighborhood moms to save the sanity of another mom during an extended bout of chicken pox. Since I was a bit older than the traditional crayons and coloring book my friend included tasty treats. One of them was Russian Tea Mix. (Fingers in ears trying desperately to ignore the screams from the tea drinkers.) I don’t know if I’d drink it these days but my kids would. It is a fond memory and now I am going to share it with you.
Russian Tea
2 cups sweetened lemon tea mix
1 1/2 cups Tang
1 tsp cinnamon
1 tsp cloves
Mix together. Store in airtight container. Put 2-3 tsp in a mug. Add one cup boiling water. Stir. Sip. Enjoy.
I usually go light on the cloves. You
can use 1/4 cup tea mix and 1 1/2 c lemonade mix if you don’t have the flavored tea.
Monday, November 28, 2011
Crazy!

Sure hope all you folks in the US had a wonderful Thanksgiving Holiday. Sometimes it is hard to list the things for which we can be thankful. I took the time to get away and reflect a bit. In the course of my travels I saw a deer by the side of the road. It was in the same place I saw a deer many years ago when I was taking another much needed time out. For some reason, the sight of that deer at those times was all I needed to refocus my energy and figure out how to move forward. It was a break from all the crazy going on around me.
And just one part of the crazy right now is making CRAZY hats. I am making them for the Golden City Brewery. If you haven't been to the Second Largest Brewery in Golden, Colorado, then you need to find the time to visit. It has been repeatedly voted the best beer garden in Denver. It is a beer garden that is open all year round. Even in the snow. Lots of snow. Enough snow to dilute a good pint. That is where the hats come in. The crazy hats. They are the official hat of the Golden City Brewery. And I get to make them.

These hats are made out of two layers of fabric. They are very warm. Boy blacksmith and I had a blast picking out the craziest fleece we could find during the holiday sales. A few of these hats will be available in my shop for folks who are missing their Mad Molly's Brown or Cherry Bomber. I have special permission to use the design to make a run of non-GCB hats too. The first Zombie Survival hat is there today.
Thursday, November 24, 2011
Pecan Pumpkin Cake Pie
1 can (15 oz) pumpkin (not pumpkin pie mix)Start by melting the butter. (I forgot to do that!) Oil, grease, spray or just melt your butter in a 9 x 13 baking dish*.
1 can (12 oz) evaporated milk
3 eggs
1 cup sugar
4 teaspoons pumpkin pie spice
1 box yellow cake mix or spice cake mix
1 1/2 cups chopped pecans or walnuts
3/4 cup butter or margarine, melted
Whipped cream, if desired
Additional pumpkin pie spice, if desired
Mix the pumpkin, milk, eggs, sugar and spice mix in the mixer. You could probably do this by hand but watch for lumps. Pour into the baking dish. It will be runny.
Sprinkle the cake mix on top. Put the pecans on top of that. Slowly pour the butter over all of that. Make sure you distribute the butter and don't just pour it in a pool in the middle. Sprinkle some more spice on top of that. Bake at 350 degrees F for 50 - 60 minutes.
*I am baking mine in my microwave using the convection function. I put it into an 8 x 12 inch baking dish. It was full but not quite overflowing. Both the cake and the pie were thicker than would be expected in a larger pan but it was yummy never the less.
I have no idea what the additional pumpkin pie spice is for or why you would desire it. If I were to use it again, I would probably add it to the cake mix. I would also be likely to try for a caramel or spice cake rather than the yellow cake.
Wednesday, November 23, 2011
Toffee Grahams

3/4 c. packed brown sugar
Dash of salt
3/4 c. butter
3/4 c. chopped pecans

Do not skip lining the pan with foil. Use easy release foil or oil your foil. This is STICKY and it won't come out of the pan if you don't line it. Set the graham cracker squares on the foil before you start the rest. Have the pecans measured and ready to go.
I made sure that I brought the sugar and butter to a boil. That eliminates some of the liquid from the butter and blends both of them together better. Boiling it does make it a little harder to spread over the crackers. I use a silicon spatula and move it around.
The next time I make this, I may add cinnamon to the sugar/butter mixture. Another option might be to sprinkle chocolate chips on the warm cookies and spread them out after they melt. I think that there are a lot of possibilities for changing this up. Leave a comment below if you have a favorite version.

I'm showing my age today. As I was typing Toffee Graham, I kept imagining that very old Saturday Night Live skit with the Candy Graham delivering land shark. I think these bars might just be as lethal.
Tuesday, November 22, 2011
Sunpainting Tutorial: Painting on Fabric General Instructions
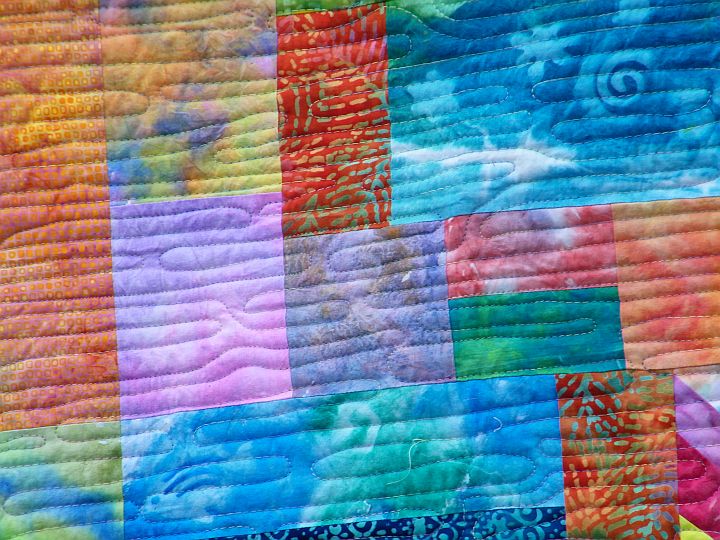 Sunlight Project Quilt 2011
For many years, I have been doing sunpainting. I started out using the Pebeo setacolor sunpaint fabric paints. First a brief history...
Sunpainting was discovered in an island setting where they left some dyed fabric out to dry. While they were gone, a palm frond fell on the fabric. When the frond was lifted off of the dry fabric, the image of it was left behind. The technique is simple. The results are beautiful and unpredictable. What follows are basic instructions for sunpainting.
 Step 1
 Step 3
 Step 3 cont.
 Step 4
 Step 5
 Step 6

Step 7
Update. Sunpainted items are available in my shop. http://waggonswest.etsy.com